
Learn how to clear cache in Excel regularly and clean up recent file lists to improve the performance of your Microsoft Office.
You must clear the cache when your Excel frequently freezes during a copy, paste, or other normal actions. This tutorial will cover how to speed up your Excel and avoid unwanted crashes.
Why is it important to clear the cache in Excel?
Clearing the cache in Excel can be important for several reasons, especially when dealing with large files or complex calculations. To clear the cache in Excel, you might need to clear the temporary files from your system, or for advanced features like Power Pivot, you may need to manage the data model cache specifically within the application.
Here is why it is important to clear the cache in Excel:
- Free up memory: Over time, as you perform various operations in Excel, the application uses memory to store undo levels, clipboard content, and other temporary files. Clearing the cache can help free up memory, which might be crucial if Excel starts slowing down or your system is low on resources.
- Remove temporary files: Excel creates temporary files as backups for faster access to operations you perform. If not removed, these files can collect and sometimes cause errors or conflicts.
- Resolve errors: Sometimes, Excel behaves randomly due to corrupt cache files. Clearing the cache can help resolve these issues and restore normal functionality.
- Improve performance: In Excel, if you are working with data models or using Power Pivot, the cache can become large as it stores data in memory for quicker processing. Clearing the cache can sometimes improve the performance by forcing Excel to rebuild the data model more efficiently.
- Privacy and security: If your Excel files contain sensitive data, clearing the cache is a way to ensure that no residual data is allowed behind on your computer that unauthorized users could access.
- Prevent conflicts with add-ins or Office updates: If you have add-ins installed or an update to Excel, sometimes the cache can cause conflicts with the new software changes. Clearing it can prevent or resolve these conflicts.
How to clear the cache in Excel?
Steps to clear the Office document cache immediately:
- Open Excel
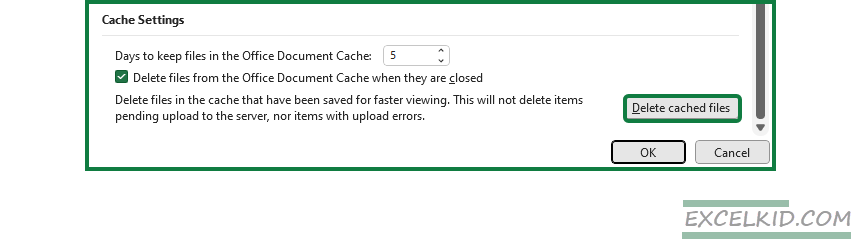
- Select File > Options > Save > Cache Settings
- Click on the “Delete Cached Files” button
Here are some additional options regarding cached documents:
If you want to keep the cache empty, ensure the “Delete files from the Office Document Cache when they are closed” checkbox is active. In this case, you don’t need to regularly clean up the cache folder.
Note: This option deletes saved files in the cache for faster viewing. It will not delete items pending uploading to the server or with upload errors.
Office Upload center missing in my Microsoft 365
In the last few weeks, we received some support emails with the following subjects:
“Office Upload center missing in my Microsoft 365”
The Upload Center is available in Microsoft Office 2019, 2016, 2013, and 2010 and supports Microsoft 365. Microsoft is replacing the “Upload Center” and now provides a new feature: “Files Needing Attention”. This feature is currently available for Microsoft 365 users.
Clear Cache in Excel using the Office Upload Center
Steps to clear the cache if you have Office 2010, 2013, 2016, or 2019 versions:
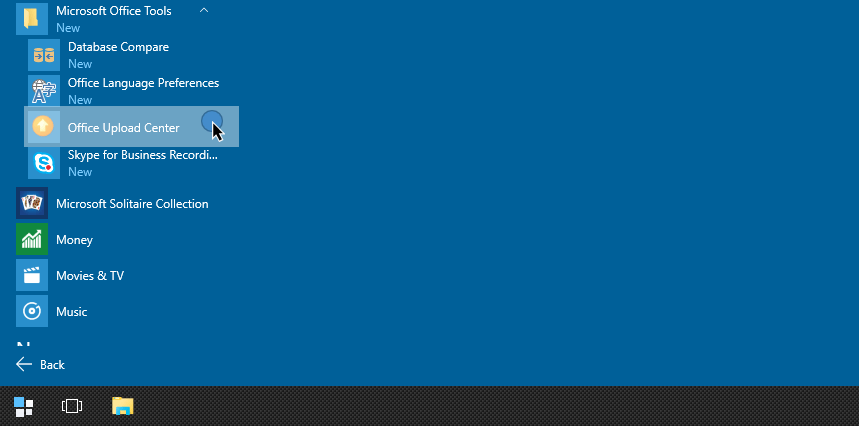
- Select Start menu > Microsoft Office Tools > Office Upload Center
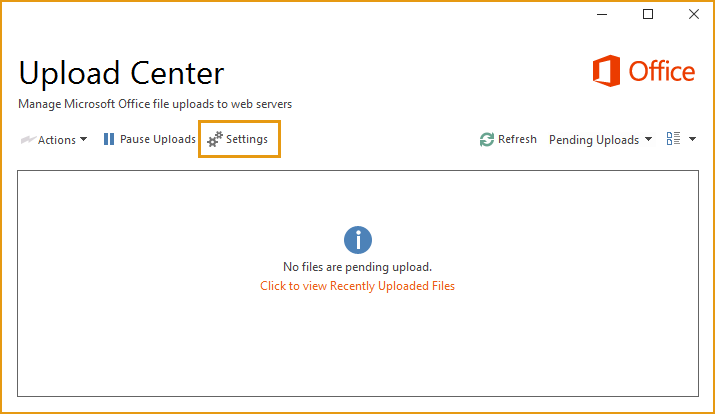
- Click the “Settings” button
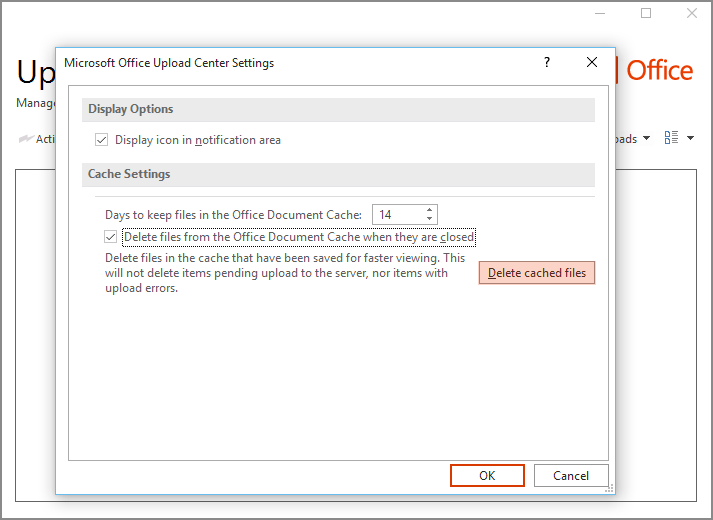
- Click the “Delete Cached Files” button
#1. Start Office Upload Center
Select the Start menu (or press the Windows key) and locate the Microsoft Office Tools menu. Click on it, then start the Office Upload Center.
#2. Use ‘Settings’
The Microsoft Office Upload Center is useful. Click on the Settings button (Gear icon) to open the Settings dialog box.
#3. Delete Cached Excel Documents
After clicking the Settings button, the Microsoft Office Upload Center Settings will appear. Under the “Cache Settings”, you can find the same options as the Microsoft 365 version.
Click the “Delete Cached Files” button to clear the document cache.
How to disable the Recent Documents List?
Microsoft Office stores the list of the last opened documents by default. When your Excel performance decreases, reducing the number of recently opened Documents to 0 is worth disabling the list completely.
Here are the steps to remove the “Recent Documents List”:
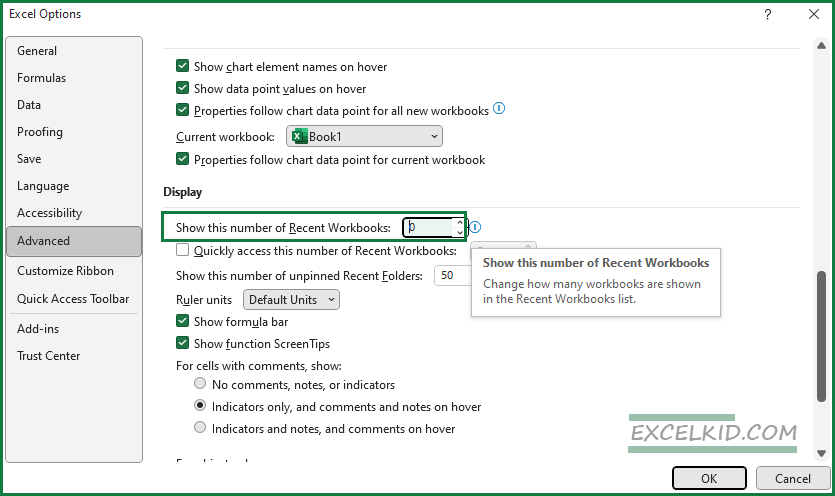
- Click File Tab > Options.
- Select the Advanced Tab.
- Scroll down and locate the Display group.
- Set the “Show this number of recent Workbooks” to 0.
- Click OK.
How to clear Pivot Table Cache?
The Pivot Table cache contains some outdated table elements. Clearing the cache is worth it if you use large tables with complex layouts, filters, and totals.
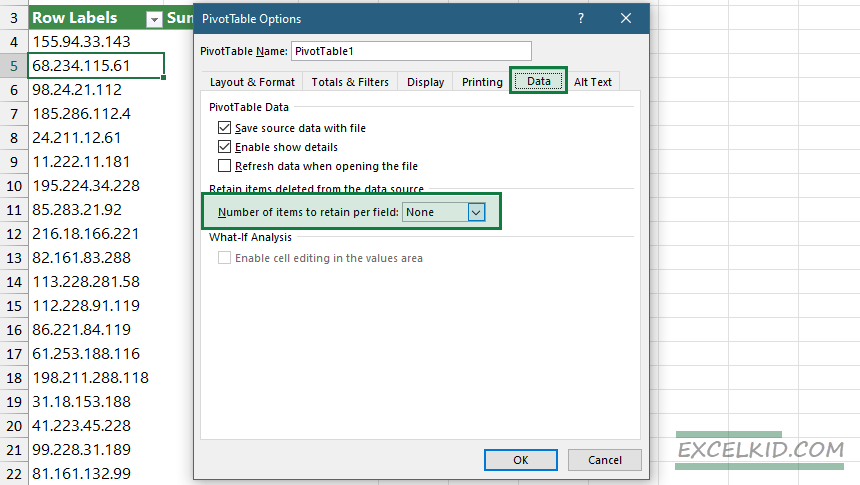
- Right-click any cell in the Pivot table
- Select Pivot Table Options from the Context menu
- Locate the Data Tab
- Set the “Number of items to retain per field” to none
- Click OK to close the dialog box
- Refresh the Pivot table using the right-click and Refresh command
You can use a “shortcut” to clear the cache by assigning the following macro to the Quick Access Toolbar. Then, press Alt + F11 to open the VBA Editor window.
Copy the code below to the ThisWorkbook:
Private Sub Workbook_Open()
Dim oPt As PivotTable
Dim oWs As Worksheet
Dim oPc As PivotCache

For Each oWs In ActiveWorkbook.Worksheets
For Each oPt In oWs.PivotTables
oPt.PivotCache.MissingItemsLimit = xlMissingItemsNone
Next oPt
Next oWs
For Each oPc In ActiveWorkbook.PivotCaches
On Error Resume Next
oPc.Refresh
Next oPc
End Sub