
Learn how to split one Excel Worksheet into multiple sheets based on a column using a free Excel add-in named Splitter Tools.
When working with large datasets, it’s often necessary to break down information based on specific criteria, such as categories in a column. The Splitter for Excel add-in is a part of our add-ins. It simplifies the process by allowing you to automatically split a worksheet into multiple sheets or even separate files.
How to Split Excel Sheet into Multiple Worksheets
Steps to split a Worksheet into separate sheets:
- Open Excel.
- Install the Splitter for Excel add-in.
- Start the tool and select the range you want to split.
- Choose the column based on which the splitting will occur.
- Choose the output format.
- Click OK to split the Worksheet.
That’s all. This free tool provides a quick solution for managing large datasets, saving users from the manual task of copying and pasting data across multiple sheets or files.
Example: Separate Excel Worksheets based on column
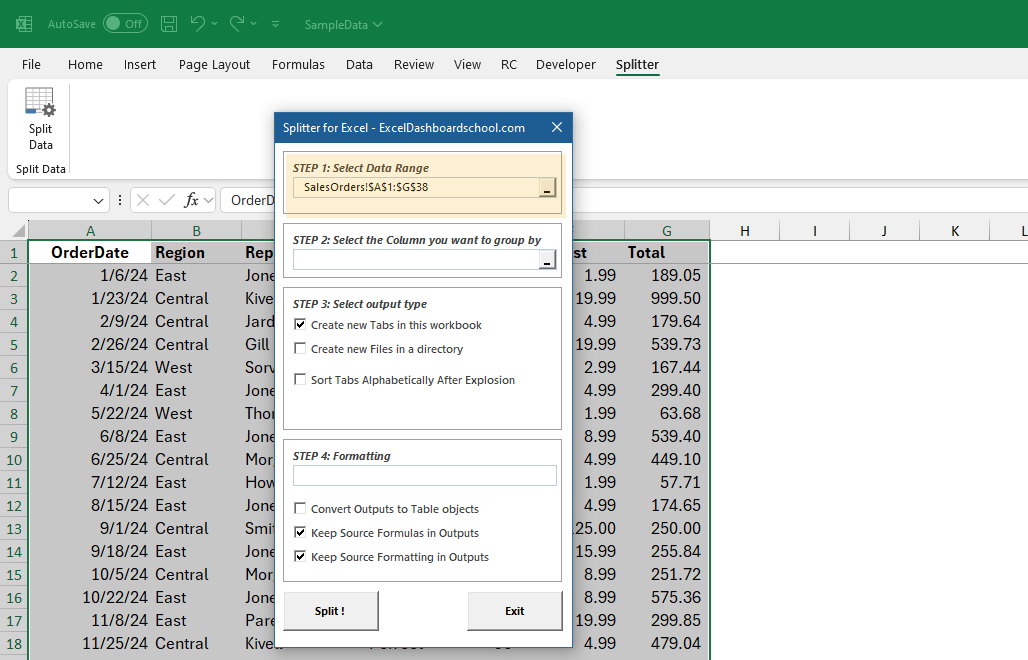
After the successful installation, you’ll see the Splitter Tab on the Ribbon.

In this example, we have a SalesOrders dataset. The goal is to split this dataset into separate sheets based on the Region column. First, open the add-in. In the add-in window, you must specify the range you want to split, A1:G38.
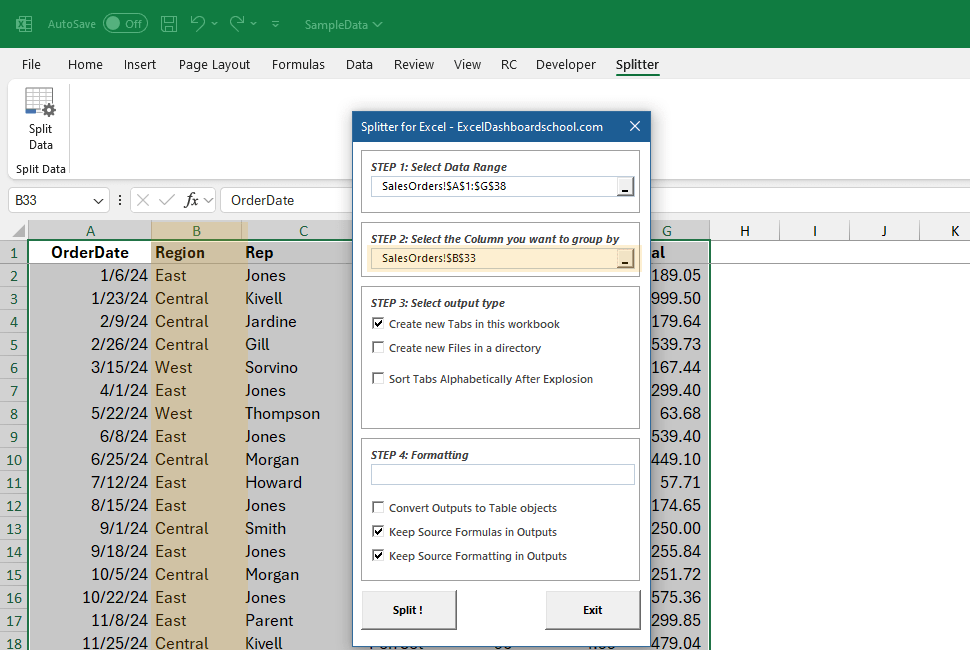
Choose the Column to Group By: Next, select the column that will serve as the grouping criterion. In this case, we want to group the data by Region to create separate reports for each region. The column containing the region information is column B, selected in this step.
Choose the output type that you want the data structured.
You have the option to:
- Create new tabs within the current workbook based on a column (as in this example).
- If you prefer to export each group to separate Excel files.
- Additionally, you can choose to sort the new tabs alphabetically after splitting.
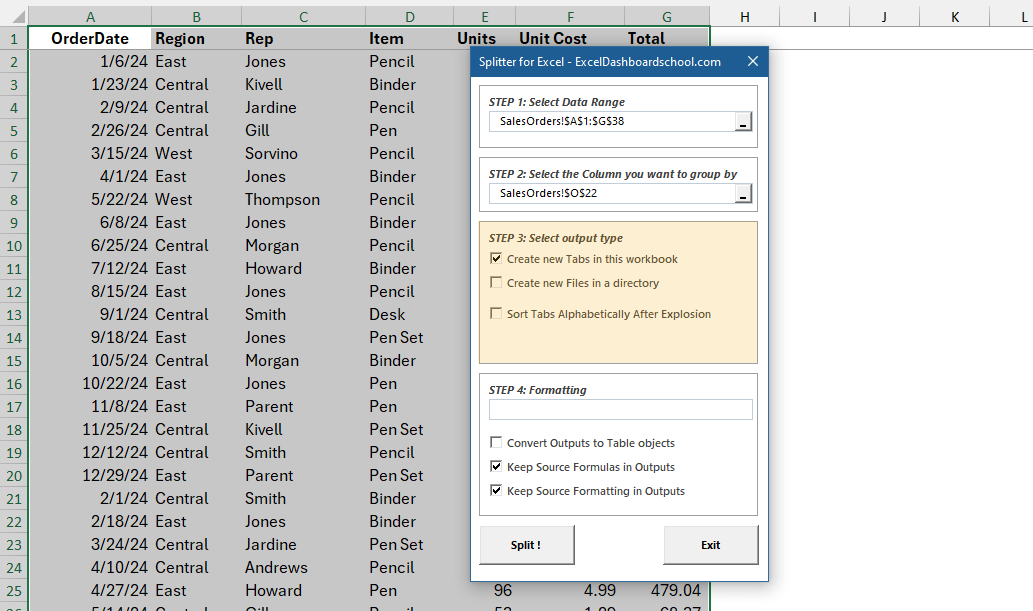
To extract the data into multiple tabs based on a selected column, the add-in offers several formatting options:
- Report Naming (Optional): First, you can provide a custom name for the generated tabs or files. For example, if you split the worksheet based on the “Region” column, the resulting tabs could be named “East_Report,” “Central_Report,” and “West_Report.”
- Convert Outputs to Table Objects: Select this option, and the range is automatically converted into Excel tables. This conversion offers easier sorting, filtering, and formatting options within each new sheet.
- Check this box to keep source formulas in Outputs. By selecting this option, you also ensure that any formulas in the original dataset are preserved in the output sheets.
- Keep Source Formatting in Outputs: This option ensures the original formatting is carried over into the new tabs or files.
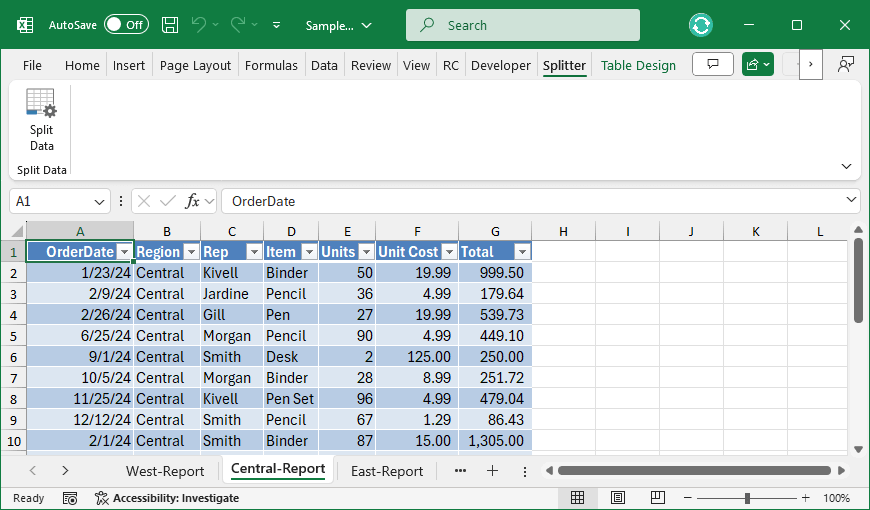
The result looks great!
How to Split Excel Worksheet into multiple files by column value
Steps to split a Worksheet into separate files:
- Install the Splitter for Excel add-in.
- Start the tool and select the range you want to split.
- Select the column you want to group.
- Choose the “Create new Files in a directory” option.
- Choose the output directory.
- Click OK to split and export the Worksheet.
Example
To split a worksheet into separate files based on a column, the process is almost the same as splitting into tabs, but with a few key differences:

- Select “Create new Files in a directory”. This will export each group as an individual Excel file. The output will be saved to the directory in the example shown: “C:\Users\PD\Documents\Reports\Regions.”
- The formatting options remain the same as those used for splitting into tabs. You can convert the outputs to table objects, retain source formulas, and preserve the original formatting in the newly created files.
- After selecting the output directory and configuring the formatting options, simply click Split! to generate the files. The add-in will name each file based on the selected column (in this case, the Region) and create a separate Excel file for each region, making it easy to manage and organize your reports.
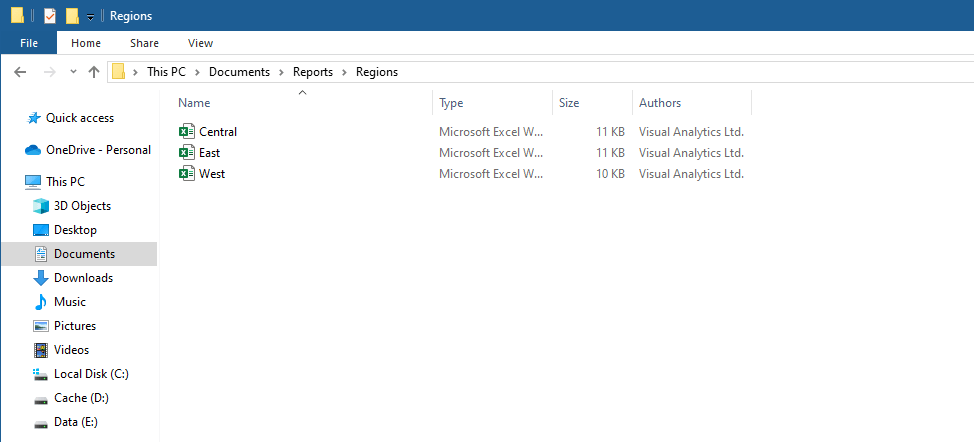
The example shows three separate files -Central, East, and West- created and saved in the output folder. Each file contains the data filtered by the corresponding region.
You can download the add-in and the sample dataset here.