The Excel Quick Access Toolbar is ideal for adding your favorite commands or storing macros because it is always visible.
What is the Quick Access Toolbar?
In a nutshell:
- The Quick Access Toolbar is customizable
- QAT is an independent tab and contains a set of commands
- It is always visible
- You can use it in two different places: above or below the Ribbon
- You can add macros to the QAT
- The toolbar is a single line. Multiple lines are not supported.
Steps to Customize the Quick Access Toolbar
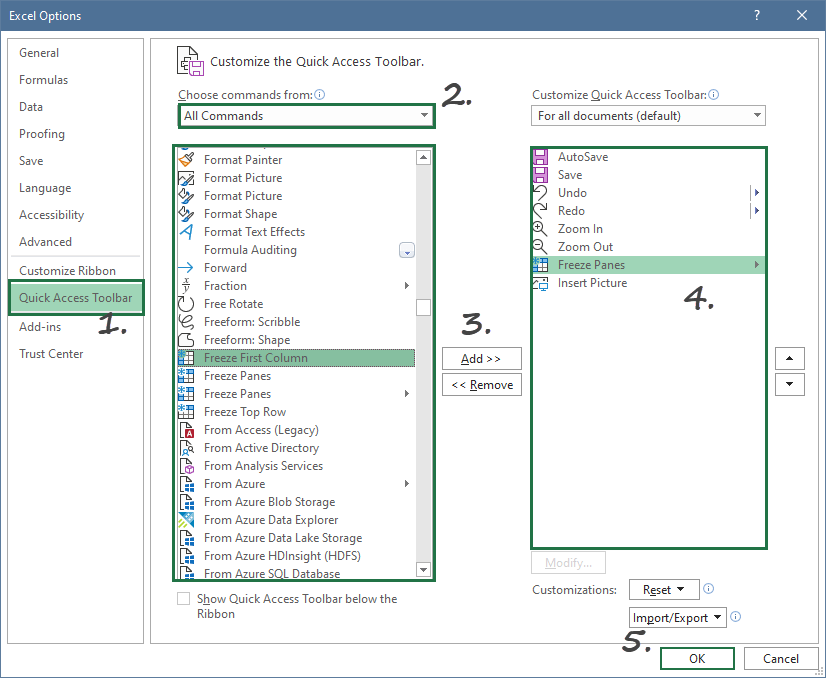
Here are the steps to add commands to the Quick Access Toolbar:
- Click the File tab, then select Options.
- Select the Quick Access Toolbar from the left pane.
- On the top of the dialog box, locate the ‘Choose Command From‘ drop-down list and select ‘All Commands‘.
- Scroll through the list and pick the command from the list that you want to add to the QAT.
- Click the ‘Add’ button to add the selected command. Finally, click OK to save the toolbar.
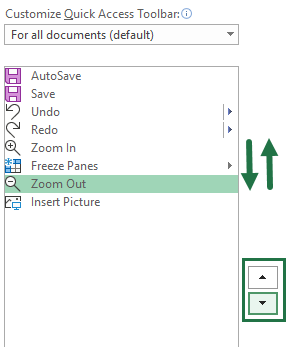
Tip: To rearrange the displayed commands, click the up and down arrow buttons. Don’t forget that if you change the order of commands, Excel will change the shortcut, too!
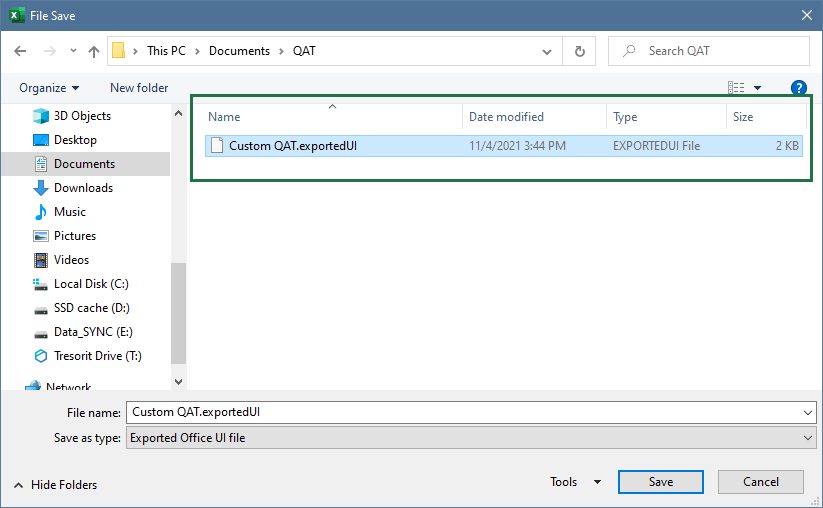
You can discover useful options here to export, import, or reset the current setup containing the hand-picked functions. Finally, move the toolbar below the ribbon by clicking the checkbox.
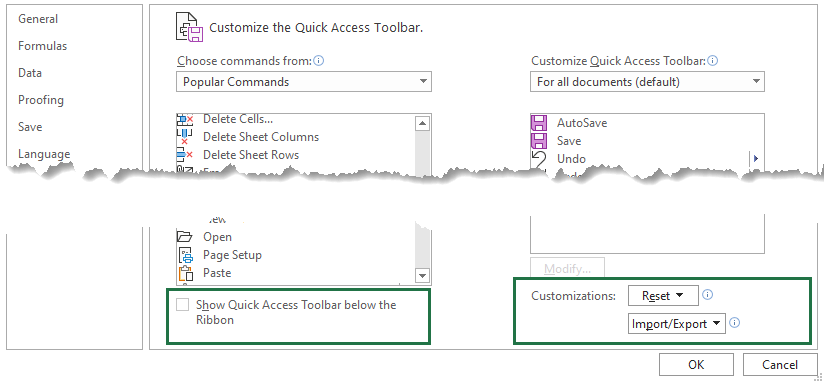
Everyone knows how frustrating it is to lose your custom settings. The export function is helpful if you want to store your custom commands. Export the list!
If you need to reinstall Office, import your setup. This is a time-saving feature; we like it!
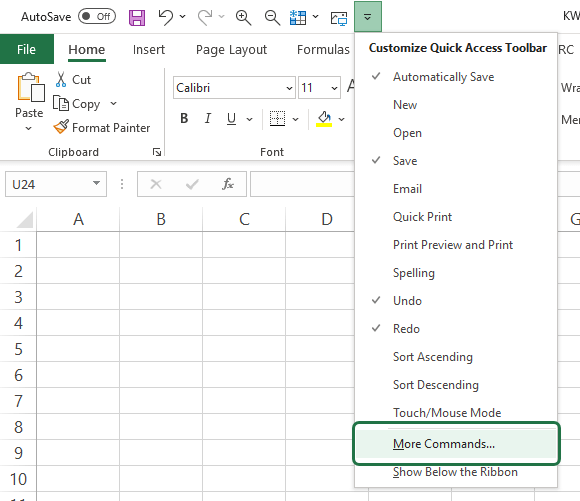
There is a faster way to customize the toolbar. To add more commands quickly, locate the Quick Access Toolbar and select the ‘More Commands’ option from the list.
Now, the Excel Options dialog box will appear.
Shortcuts
Using Excel Shortcuts is the fastest way to reach your favorite commands. We have good news: Excel assigns a shortcut to every command on the QAT. Thus, you can start the given function quickly!
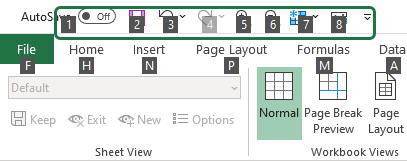
In the example, you can use the shortcuts from Alt, 1 to Alt, 8.
The point is to press the Alt shortcut key first! After that, check the commands’ orders. Finally, press the command’s position on the QAT. It’s not rocket science.
Back to the example: in this case, if you want to use the Redo command, apply the Alt, 3 sequences.
Important: The demonstrated commands and their QAT positions can be variable. The Alt + Number shortcuts depend on the order of functions you’ve added.
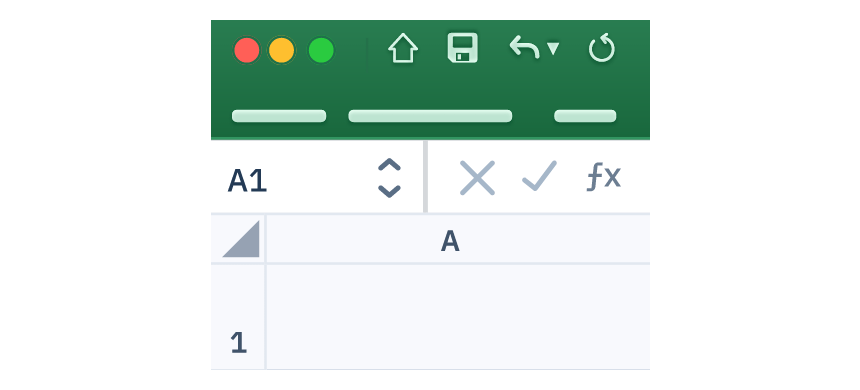
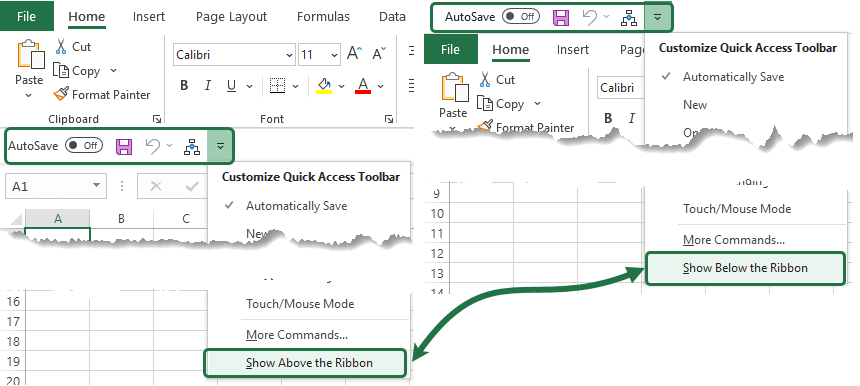
Moving the QAT
By default, you can find the Toolbar above the ribbon. However, moving the toolbar below the ribbon is easy if you prefer another view.
How to add macros
Last but not least, here is a great trick. If you read this article, you’ll face the following information: “Only commands can be added to the QAT.”
No, not all. In reality, you can add macros too. In this guide, you will learn how to do that! Macros play a vital role in Excel. Apply user-defined functions and custom formatting styles! By default, you can use them from the Developer tab or assign a shortcut to execute them.
We will add a subscript shortcut macro to the QAT in the example.
Steps to add macros to the Quick Access Toolbar:
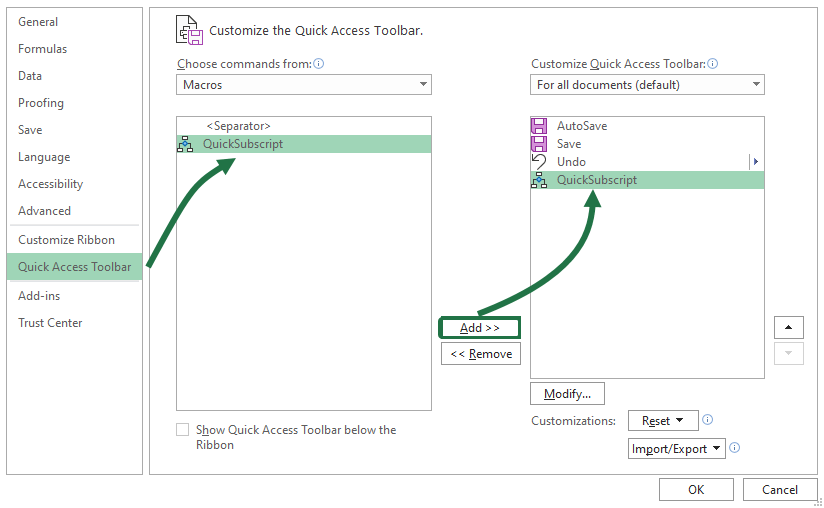
- Click the QAT drop-down menu and choose ‘More Commands’ from the list
- From the Choose Commands, from the drop-down list, choose Macros.
- Select the macro that you want to use on the Quick Access Toolbar.
- Click OK to close the dialog box.
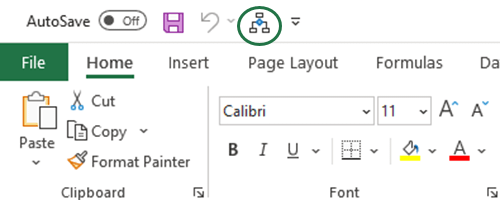
The macro now appears on the toolbar. Click on the icon, and Excel will execute the macro.
You can add a unique icon for each command if you work with multiple macros. (By default, all newly added macros have a default icon.)
To do that, follow the steps below:
- Open the Options dialog box
- Select the QuickSubscript macro
- Click Modify
- Choose an icon for the macro
- Click OK to close the dialog
Above the ribbon, Excel will show the new macro icon.
Additional resources:
- Quick Analysis Tool
- How to Remove Table Formatting in Excel
- How to Wrap Text in Excel
- How to Freeze Panes