
Improve user experience (UX) using the ribbon navigation menu. Learn how to create stunning navigation with minimal programming knowledge. Prototyping your navigation menu before building an Excel dashboard enables you to interact with your spreadsheet elements in real-time from the start.
Steps to create a ribbon navigation menu
1. Know the final dashboard structure
- How many Worksheets are in a Workbook?
- Which types of buttons represent the primary functions?
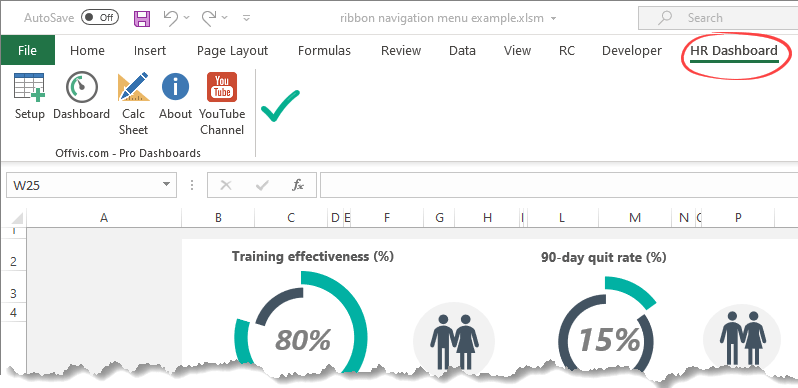
When it’s done, we can begin the work. In the example, we use three Worksheets to follow the design fundamentals: data, calc, and dashboard.
2. Select the ribbon icons for the navigation menu
We’ll implement five icons, three for the main worksheets and two additional icons for extra functions.
3. Download the Office RibbonX editor
This tiny tool lets you insert a customUI.xml file in your Excel workbook.
Check and download the latest version from GitHub. After that, extract the zip file content.
The editor has a simple interface:
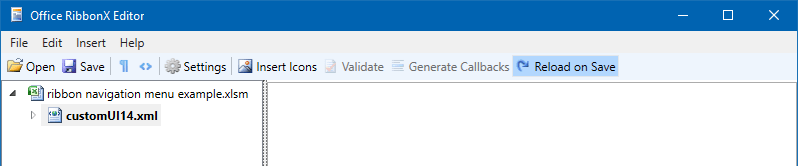
- First, open the file you want to edit (Excel must be closed!)
- Then, save the RibbonX in the file.
- Insert custom icons
- Validate the ribbon
- Generate callbacks (you can copy it in a normal module)
4. Open the Excel file that you want to edit
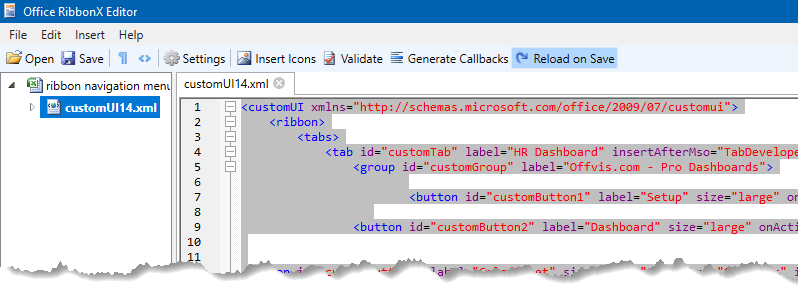
Copy and paste the code below:
<customUI xmlns="http://schemas.microsoft.com/office/2009/07/customui">
	<ribbon>
		<tabs>
			<tab id="customTab" label="HR Dashboard" insertAfterMso="TabDeveloper">
			<group id="customGroup" label="Offvis.com - Pro Dashboards">
<button id="customButton1" label="Setup" size="large" onAction="ShowSetup" image="data" />
<button id="customButton2" label="Dashboard" size="large" onAction="ShowDashboard" image="dial1" />
<button id="customButton3" label="Calc Sheet" size="large" onAction="ShowCalc" image="design" />
<button id="customButton4" label="About" size="large" onAction="ShowAbout" image="info" />
<button id="customButton5" label="YouTube Channel" size="large" onAction="jumptoyoutube" image="youtube" />
			</group>
</tab>
</tabs>
</ribbon>
</customUI>
Insert icons, and with its help, you can navigate the Worksheets. Now save the workbook.
5. Create macros for sheet selections
In the example, we’ll show you how to manage the worksheets from the ribbon. But first, press Alt+F11 to open the VBE window.
Create a new module and paste the SelectDashboardSheet() macro.
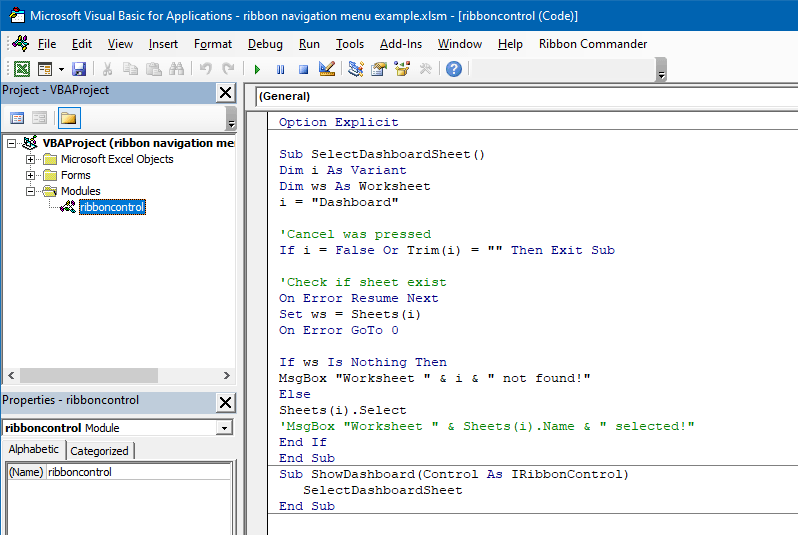
Close the window and save the workbook in xlsm format. Next, you have to create two subs by worksheets. The first macro selects the given worksheet.
The second sub is the link between the ribbon and the SelectDashboardSheet() macro. It works like a command button! Repeat these steps for all worksheets that you want to activate.
Additional resources: