The Stop if True option can stop processing the current rule when the condition is met and ignore the other rules. Let us see how it works!
It often happens that with the use of conditional formatting, we create multiple rules.
How to use Stop If True with Conditional Formatting
Let’s see a simple example: In a given range that contains prices, we would like to apply two rules simultaneously.
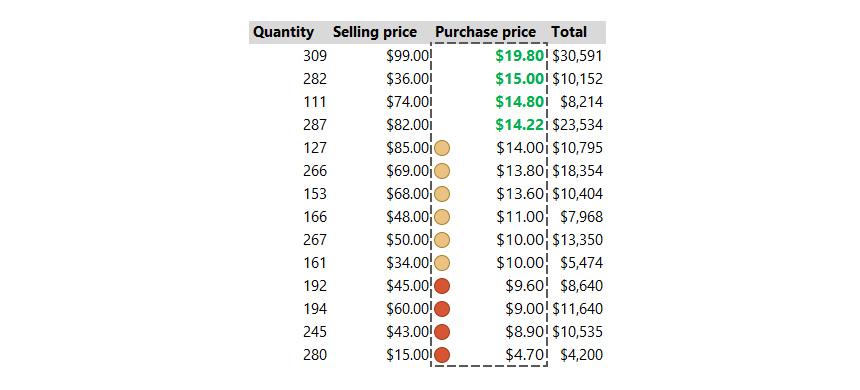
Rule 1: A traffic light icon set (red, yellow, green) indicates the value in the given cell compared to the other cell values. Red is the upper third, yellow is the middle third, and green is the bottom third.
Rule 2: Emphasize the prices that belong in the upper 1/3rd, but use a different formatting method here! This is not a bad idea on its own!
Will there be an overlap between the rules?
Yes, there will be!
Because based on the applied icon set rule, it will fill in all the cells. And this will contain the values that belong to the upper 1/3rd. So, how can we deal with the problem?
Excel conditional function offers an elegant solution. Let’s see what happens when we use the Stop if True tool.
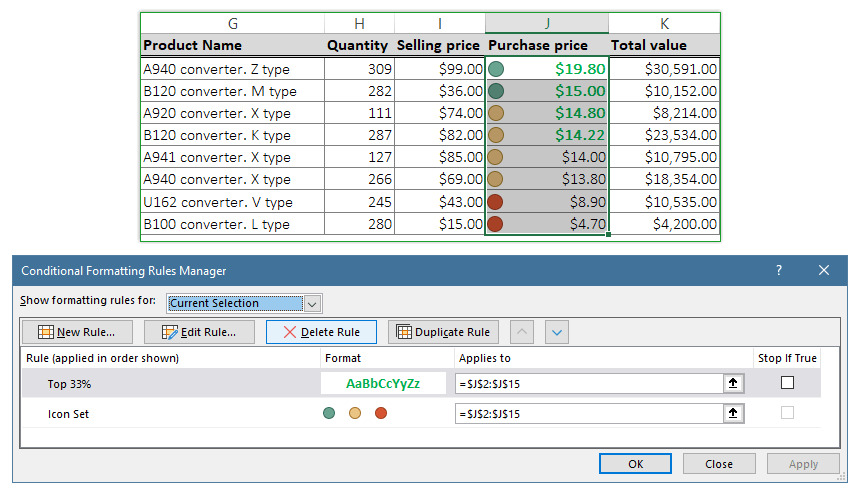
We selected the J2:J24 range and used a traffic light shape set to the J column to highlight low, middle, and high-priced products.
But what if we want to highlight the top 33% of the purchase price, too? If we create a new rule, we provide extra information, which is not necessary. To avoid visual accidents, we’ll use the stop-if-true rule.
Click OK to return to the Manage Rules box.
Check the stop if true box to the right of the new rule you created.
Click OK.
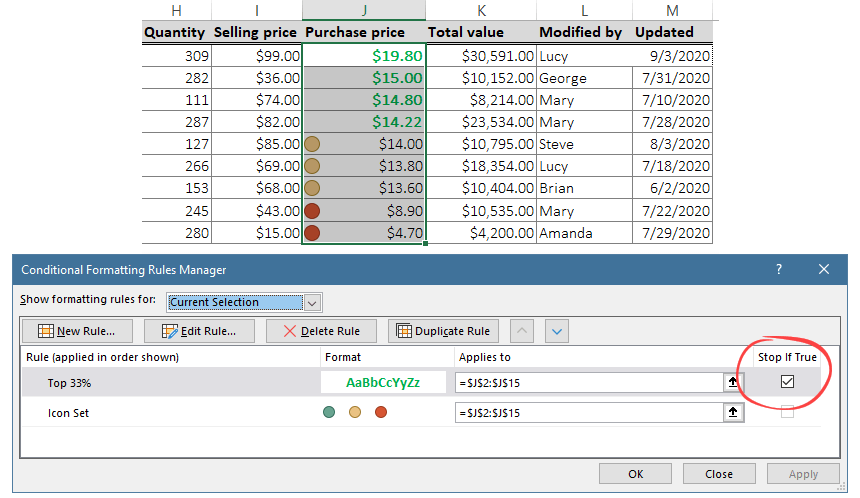
Looks great! The given range will only show the item icon sets, NOT in the top 33%.