
In today’s example, we’ll introduce data entry using the UserForm. Using UserForm can considerably improve our users’ interaction and assist them in executing particular steps.
Form controls play a very important role in automating Excel. Without them, no business dashboard can be imagined.
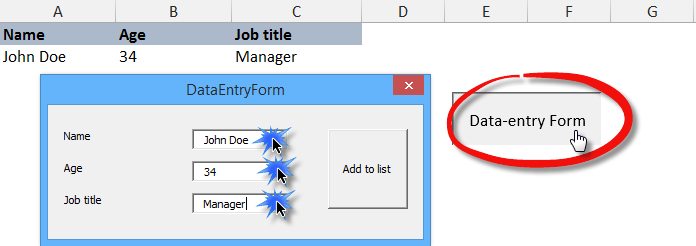
Let’s say a few words about today’s task. Data entry can sometimes be very dull, which can incline users to make mistakes. Based on three data (Name, Age, Job title), we’ll design a form to upload a “database”.
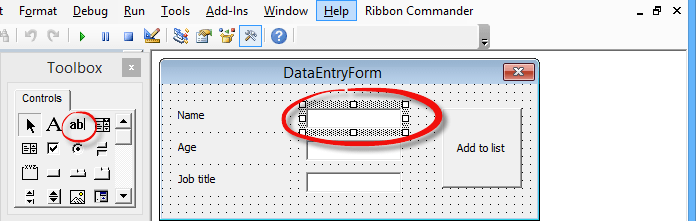
Exactly, as you can see in the picture below! Three labels, three text fields. And another thing is the Command Button. We’ll assign a simple macro that will store input data to this.
How to create a UserForm to aid data entry?
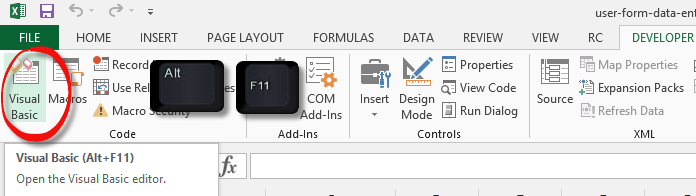
Let’s start! The first step is entering the Visual Basic Editor from the ribbon or pressing the Alt+F11 buttons.
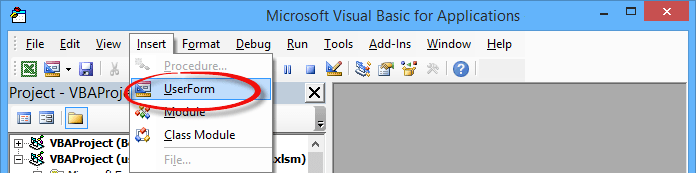
Open the VBA Editor. If the Project Explorer is not visible, click View, Project Explorer. Click Insert, and select the Userform.
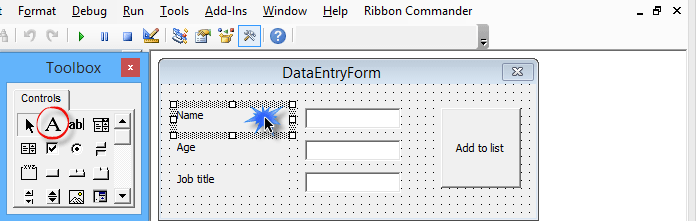
After this, place the fields and their names onto this form.
Now insert the names of the fields by clicking on the Label Control button:
As next step follow the TexBox belonging to the names. This option enables data insertion.
Change any elements and attributes of our form by right-clicking on them and then choosing the Properties window.
For the next step, we can set the fonts, sizes, and colors.
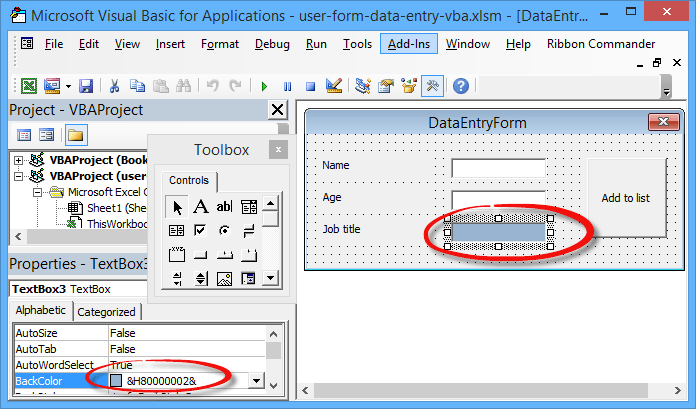
We can be all creative regarding the designs. We can make any kind we’d like or what we need for a given task.
Now, we will place another button on this form. This button will fix the given data in one Excel table.
We do this by inserting the CommandButton from the Controls:

Let’s see what the data entry form looks like now:
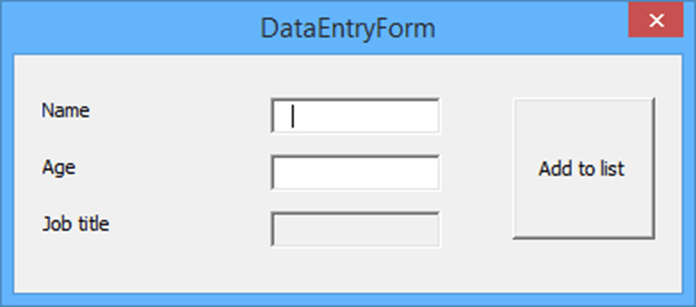
The user interface is ready! Data input will be a lot easier from now on. But we still have one very important thing to do.
Because for the next step, we have to determine the code behind it.
This example would run by clicking the “Add to list” button.
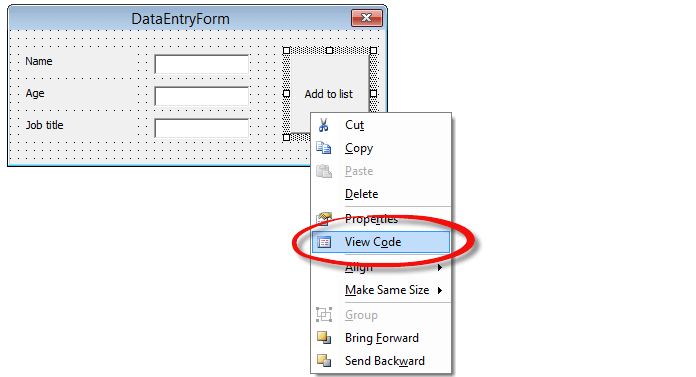
Let’s right-click the CommandButton.
From the drop-down menu, choose the View Code command. The next chapter will show how to assign a short VBA code to this.
Adding Logic to Button in a Form
Let’s clarify what we expect from the code after clicking the button.
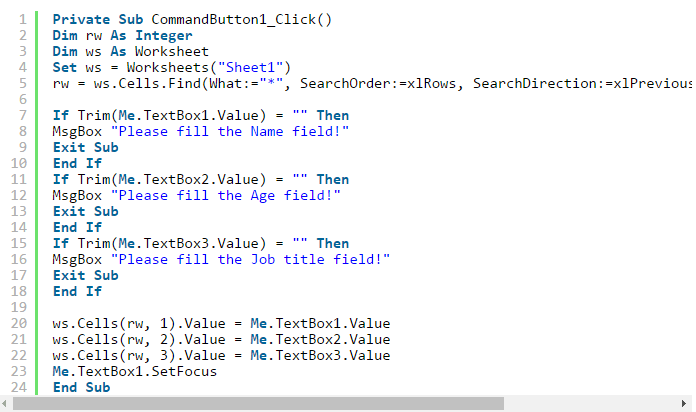
We will expect that it inserts the UserForm values into the determined rows’ determined cells.
For this, we must know where the next empty line in the table is.
After the insertion, we have to equal the appropriate cells to the input values of the appropriate fields.
To begin, let’s define two variables.
The first one with Integer type by the name rw to determine the current, still empty rows.
The second one by the name ws and with type Worksheet.
This will determine which worksheet our form will refresh/update the cells.
We can already set the values of the latter variable on Sheet 1.

Use the Range Find method to determine the starting value of our rw variable.
In our case we have to use the ws.Cells.Find method because we are looking for cells in Sheet 1 that contain anything (What=”*”).
We search by rows (SearchOrder:=xlRows) for the row containing the last (SearchDirection:=xlPrevious) value (LookIn:=xlValues).
Then we add one to this number to find the first empty row:
rw = ws.Cells.Find(What:=”*”, SearchOrder:=xlRows, SearchDirection:=xlPrevious, LookIn:=xlValues).Row + 1
From this point on, our task is easy.
The written value in the field must be equal to the rw variable. We store the number of the cells in the rw variable.
If we did not use standard names for our fields, we can find out their names from the UserForm Properties window.
Therefore, ws.Cells(rw, 1).Value (this is the cell of Sheet1, first empty row in the first column) be equal to Me.TextBox1.Value, which is the value, was given in our first field.
Me always refers to the parent object that we “have” our code.
In this case, it refers to UserForm, but if we were to write our code on a Sheet, it would refer to that.
Create User-Feedback MessageBox
Here, it might be subservient to inform the user what happened to the input data so we can write a message for him using the MsgBox command.
At this time, the popup message window should have only one OK button (vbOKOnly parameter), but of course, with the help of the other parameters of the MsgBox, we can tune this to our liking.
MsgBox “Stored!”, vbOKOnly
If it is done, we can delete the input values from our fields. We can do this because they are already in the appropriate cells.
The solution is easy:
We make the value of the Me.TextBox1.Value equal to nothing.
After this is useful to bring the cursor back to the first field with the help of the SetFocus parameter.

Error handling – How can we do this?
We have to endeavor to write the codes with minimal possible errors.
For this, inserting an “if” branching is useful so that if there are empty cells, the UserForm will do nothing. We only aim to store the data if all the cells/fields are filled out! The following shortcode will alert the user of insufficient data.
Turn our thoughts to the code, namely
1. Put (If) after the removal of spaces (Trim)
2. Values of the first fields (Me.TextBox1.Value)
3. Equal to nothing (= “”)
4. Then (Then)
5. Write a message (MsgBox “Please fill the field!”),
6. Then exit (Exit Sub)
7. We can close the “If” branching (End If).
The VBA code:
What else is there left to do? To determine how to start the UserForm.
Here, we can also set events or key combinations.
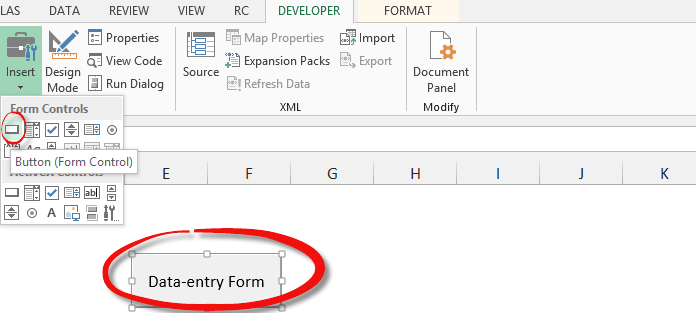
In our example, we choose the simplest solution. We assign the startup of the code to a CommandButton.
Under the Ribbon Developer tab, the Controls section can be found.
Let’s insert a button with the help of the Insert command:
By double-clicking on the button in Design Mode, we get over to the Visual Basic Editor.
We only need to show the UserForm named by the DataEntryForm command for the “Click” event.
Here is the code snippet:

And we are done!
After clicking on the button, the UserForm opens. After filling this out, the data is entered into the appropriate cells.
Conclusion:
Excel is worth using for serious tasks, and VBA helped us create an interactive form for the Excel dashboard. We hope you got into VBA programming mode. We recommend that everyone start building their little project!